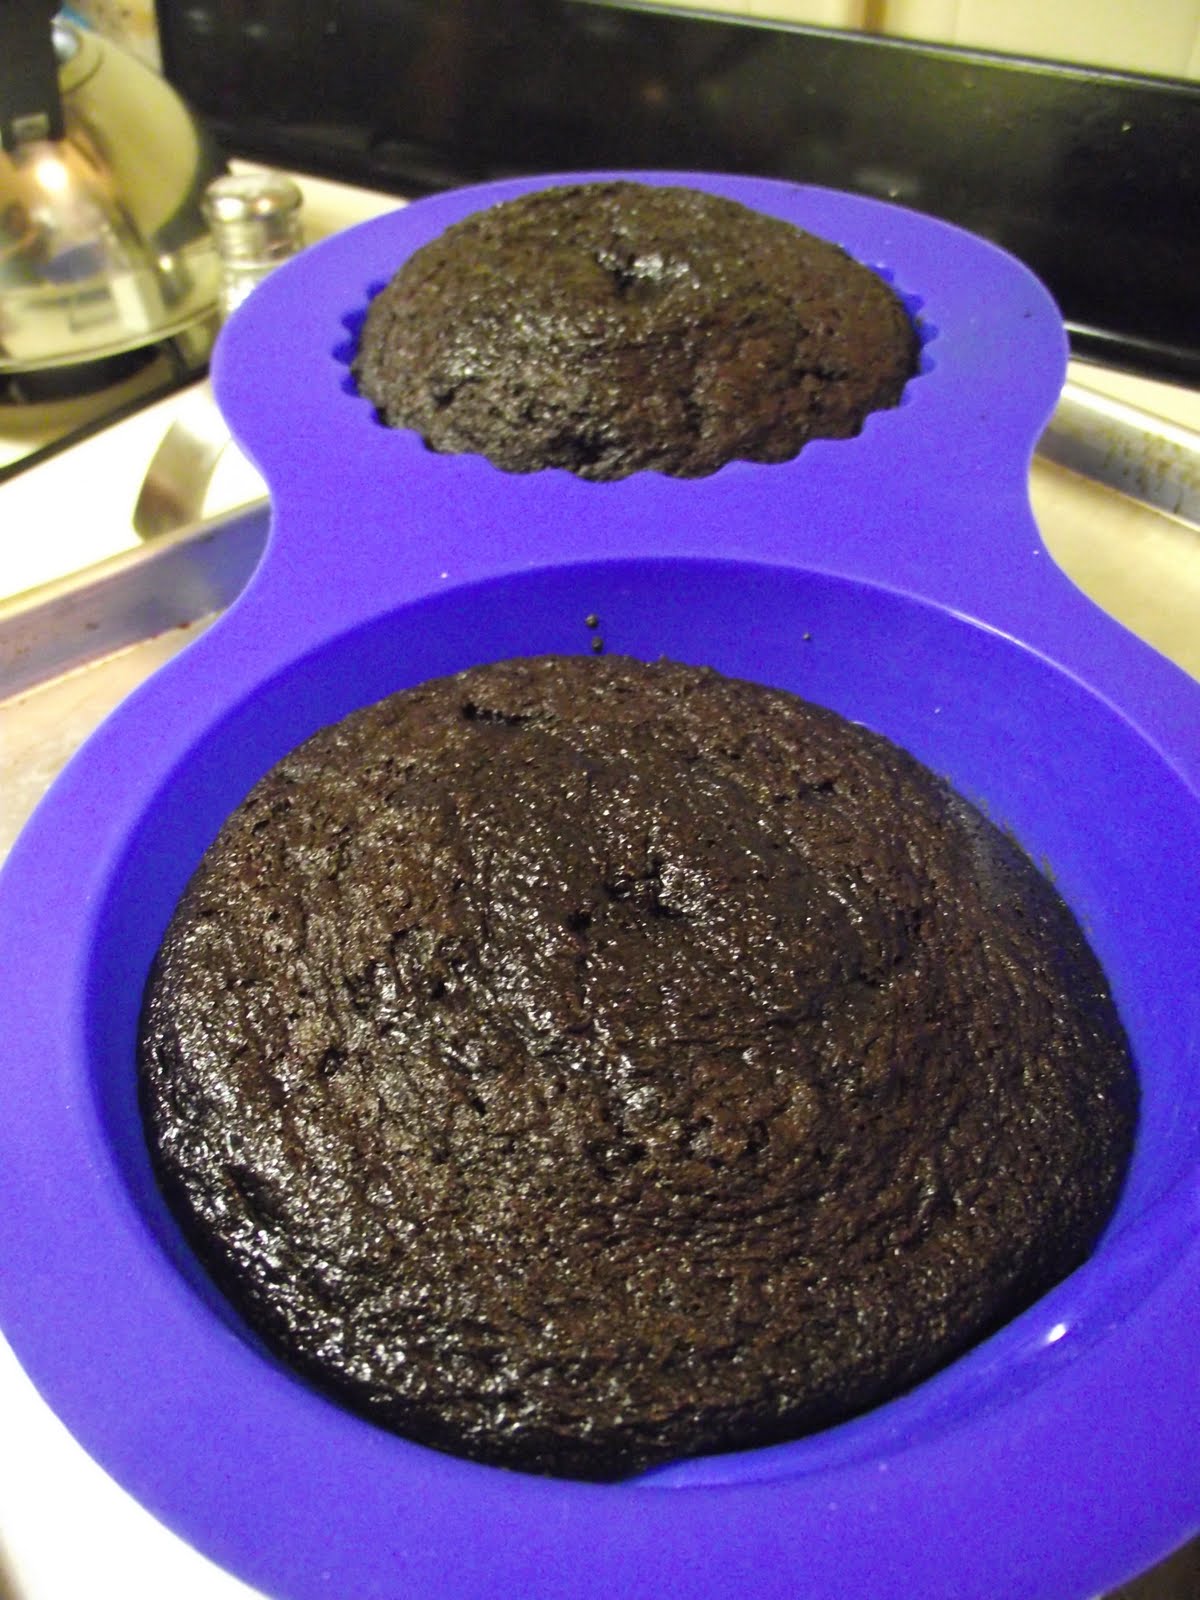
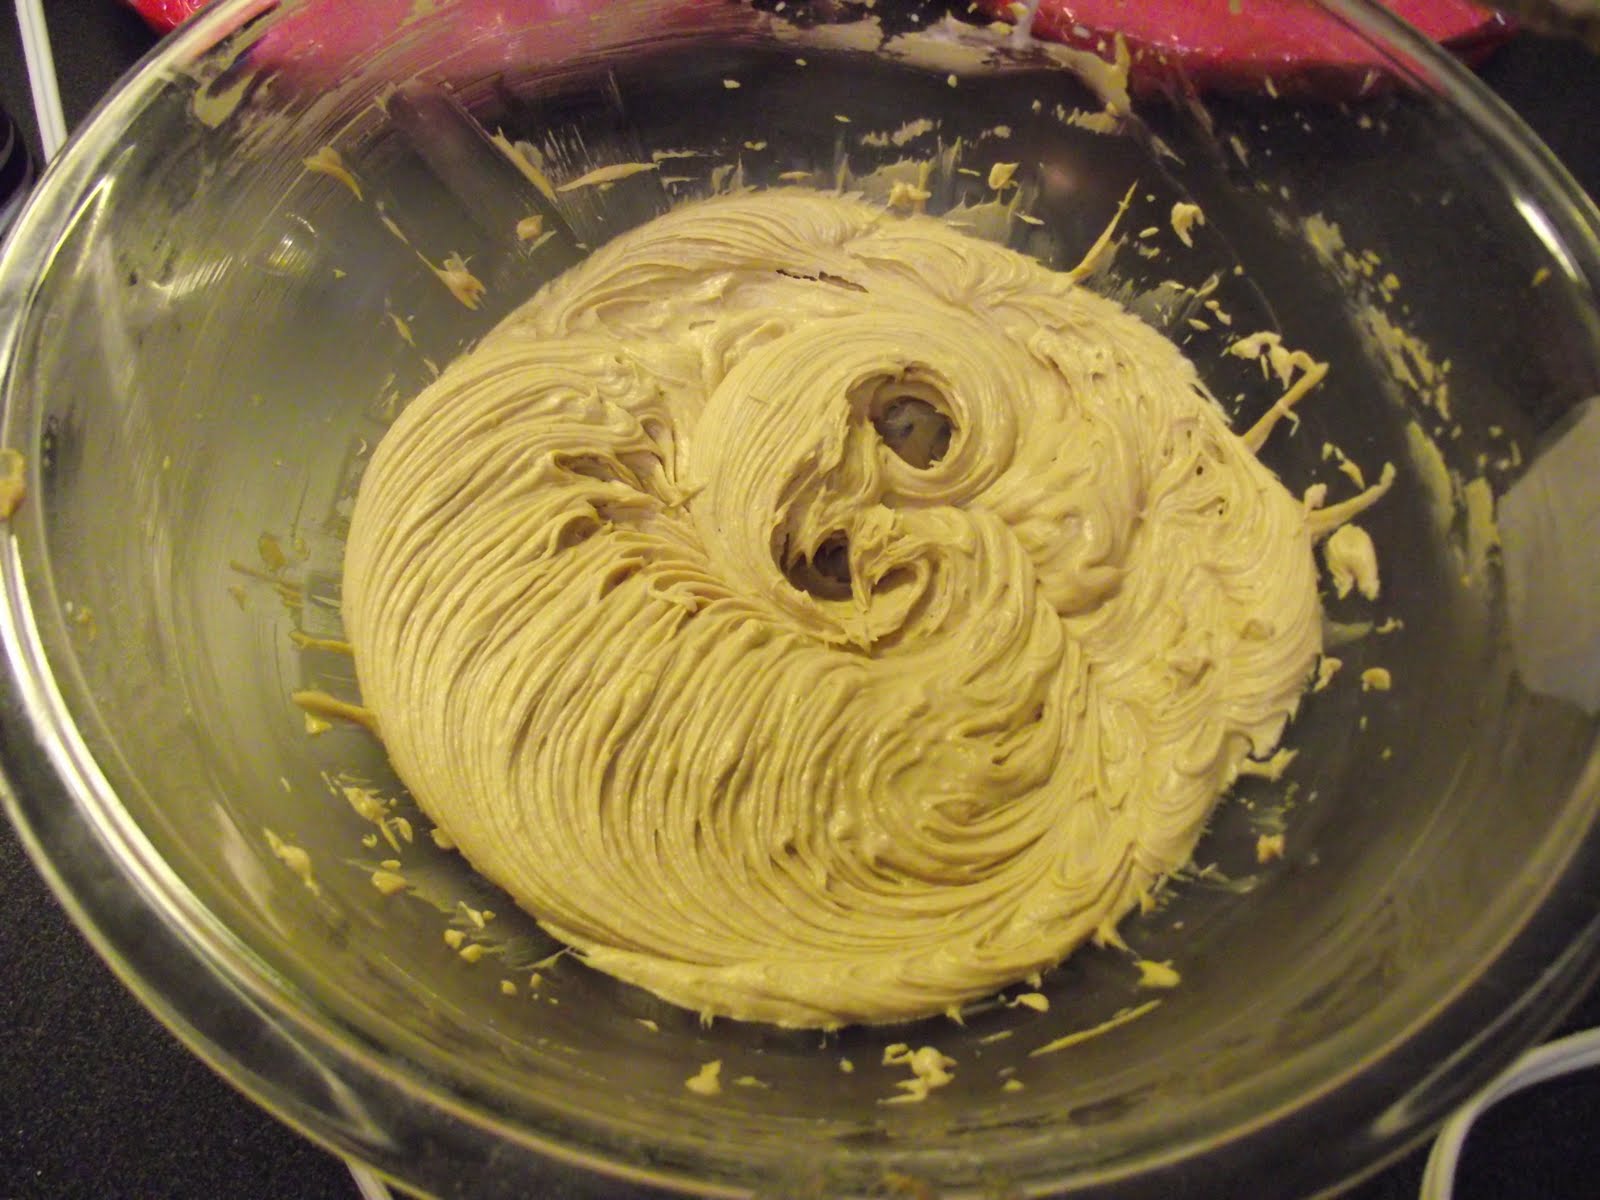
I've made these cupcakes for Elias' birthday the last two years in a row. As I rarely repeat birthday creations, that's saying something. They are that good. The pumpkin cupcake is moist and delicious and so appropriate as we enter fall. The frosting is creamy and sweet (but not too sweet) and wonderfully spiced. They are an awesome combination. Try them out. You won't regret it.
Browned Butter Pumpkin Cupcakes
barely adapted from Baked Perfection
3/4 cup unsalted butter
1 2/3 cups all-purpose flour
2 tsp baking powder
1 tsp salt
1/2 tsp cinnamon
1/4 tsp nutmeg
1/8 tsp cloves
1 cup canned pumpkin puree
1 cup packed brown sugar (dark if you have it)
1/2 cup granulated sugar
2 eggs
Preheat oven to 325 degrees. Line muffin tins with paper liners. In a saucepan, melt your butter over medium heat. Continue cooking, swirling the pan, until the butter turns golden brown and has a delicious, nutty aroma. Pour the browned butter into a bowl immediately (to prevent it from over browning) and let cool a bit. Revel for a minute in the delicious smell.
Whisk together the flour, baking powder, salt and spices. In a separate bowl, whisk together the pumpkin, sugars, eggs and browned butter. Add flour mixture to the wet and whisk until just combined.
Fill muffin tins until 3/4-full. Bake until cake tester comes out clean, about 20 minutes. Transfer tin to wire racks and cool completely.
Makes 15 cupcakes.
Cinnamon Cream Cheese Frosting
not at all adapted from Baked Perfection
1/2 cup unsalted butter, softened
8 oz cream cheese, softened
3 cups powdered sugar
1 tsp cinnamon
1 tsp vanilla extract
Beat butter and cream cheese with a mixer on medium-high speed until fluffy, about 3 minutes. Reduce speed to low. Add sugar, 1 cup at a time and then add cinnamon and vanilla. Mix until smooth.
Showing posts with label desserts. Show all posts
Monday, October 21, 2013
Tuesday, October 8, 2013
Apple Cinnamon Donuts
We made donuts a couple of weeks ago.
This guy had never gotten to taste a donut before. He was pretty excited to help out.
I made some very minor adaptations to Food Allergy Mama's recipe to account for the fact that Asher can now have baked dairy. Here's the recipe as I made it:
Apple Cinnamon Donuts
adapted from The Food Allergy Mama's Baking Book
oil for frying
1/4 cup plus 2 Tbsp unsweetened applesauce (3/8 cup)
1 tsp vanilla extract
1/4 cup plus 2 Tbsp granulated sugar (3/8 cup)
1 1/2 Tbsp butter, melted
2 1/4 all-purpose flour
1 3/4 tsp baking powder
1/2 tsp cinnamon
1/4 tsp nutmeg
1/4 tsp salt
1/2 cup milk
1/4 cup granulated sugar
1 tsp cinnamon
These are seriously delicious and they make your house smell awesome! I think this will be a fall tradition in our house.
This guy had never gotten to taste a donut before. He was pretty excited to help out.
I made some very minor adaptations to Food Allergy Mama's recipe to account for the fact that Asher can now have baked dairy. Here's the recipe as I made it:
Apple Cinnamon Donuts
adapted from The Food Allergy Mama's Baking Book
oil for frying
1/4 cup plus 2 Tbsp unsweetened applesauce (3/8 cup)
1 tsp vanilla extract
1/4 cup plus 2 Tbsp granulated sugar (3/8 cup)
1 1/2 Tbsp butter, melted
2 1/4 all-purpose flour
1 3/4 tsp baking powder
1/2 tsp cinnamon
1/4 tsp nutmeg
1/4 tsp salt
1/2 cup milk
1/4 cup granulated sugar
1 tsp cinnamon
- In a large pot, heat 2 to 3 inches of oil until a candy thermometer inserted reaches 375F.
- Meanwhile, in the bowl of a stand mixer fitted with the paddle attachment, combine the applesauce, vanilla, and the 3/8 cup sugar. Add butter and mix well. In a separate bowl, combine flour, baking powder, 1/2 tsp cinnamon, nutmeg, and salt with a wire whisk. Add the flour mixture and the milk alternately to the applesauce-butter mixture. If needed, add more flour until the dough is smooth and not overly sticky.
- Transfer the dough to lightly floured surface. Knead for about a minute and roll out to a thickness of 1/2 inch. Dip a doughnut cutter into flour and cut dough. Remove trimmings, reroll and repeat the process as needed.
- Drop a couple donuts into the hot oil. Fry donuts until they rise to the surface, about 2 minutes, and turn over to fry other side. Once donuts are golden on both sides, lift out with metal tongs and drain on paper towels.
- Mix the rest of the sugar and cinnamon and put in a bag. Place warm donuts, one at a time, in bag and shake to coat. Enjoy!
These are seriously delicious and they make your house smell awesome! I think this will be a fall tradition in our house.
Labels:
allergen-free,
bread,
breakfast,
desserts
Thursday, April 19, 2012
birthday cake #1
Addilyn had a rainbow-themed birthday...mostly because I wanted to make this cake. It wasn't super hard to make, just time consuming, but it was so pretty that it was well worth the wait.
After all the layers have baked and cooled come the fun part: assembly and frosting. I used the white frosting recipe from the same Better Homes and Gardens cookbook but, again, you could use the stuff from the can and be just as happy. Look at all those pretty layers all stacked up! This could be another fun and attractive way to serve this cake...with all the layers exposed. So pretty!
Now all the layers are hidden and ready for the surprise upon cutting.
My husband calls this view "Flamboyant PacMan". I love it!
Here it is all cut up and ready for eating. Such pretty colors and such rainbow fun! This idea has been floating around out there for a while so if you haven't tried it already, get going! It is fun for birthdays or whenever your day needs some brightening. Enjoy!
Wednesday, November 30, 2011
Mom's Pecan Pie
I don't really like nuts. I never have. My husband doesn't like them either which just kind of vindicated me. I've already adapted quite a few recipes to exclude them...banana nut bread becomes banana bread, cranberry nut muffins becomes cranberry muffin, etc. So why, you ask, would I even try making pecan pie? I don't know; it seemed like a good idea at the time.
My Mom has a really good recipe for pecan pie. Ironically she doesn't eat pecan pie either (although she does like nuts in general). Everyone she makes it for just raves over it though. I made it a while ago and I managed to mess it up. I misread her recipe. Well, that's not 100% accurate (and Tyler would be hugely offended if I wasn't accurate). This is actually what happened. The recipe calls for 1/4 cup butter but in parentheses it said 1 stick. I glossed over the 1/4 cup and just went with the 1 stick. After I had mixed everything up, I occurred to me that the average stick of butter is 1/2 cup and not 1/4 cup. I came up with 2 possible options for the discrepancy. Either my Mom put the wrong measurement down or she buys half sticks. While the pie was already in the oven, I called my Mom to see which it was (because I could do absolutely nothing about it then anyway). Unfortunately, it was the second option. So I stared at the pie and let it bake an extra 15 minutes and it turned out great! Really though, can you go wrong with too much butter in a dessert? So here is the adapted recipe.
Mom's Pecan Pie
with an accidental adaptation by Erin
4 beaten eggs
1 cup sugar
1 cup light corn syrup
1/2 Tbsp flour
1/2 cup butter (1 stick)
2 1/2 cup pecans
pinch of salt
The final product: sweet, buttery and delicious. As this was my first taste of pecan pie, I don't have anything to compare it to but I thought it was ooey, gooey and wonderful. I took it to a potluck dinner and it got rave reviews from all the pecan pie connoisseurs there. And look how pretty it is! I'm a sucker for pretty and sweet so I'll probably make this frequently.
My Mom has a really good recipe for pecan pie. Ironically she doesn't eat pecan pie either (although she does like nuts in general). Everyone she makes it for just raves over it though. I made it a while ago and I managed to mess it up. I misread her recipe. Well, that's not 100% accurate (and Tyler would be hugely offended if I wasn't accurate). This is actually what happened. The recipe calls for 1/4 cup butter but in parentheses it said 1 stick. I glossed over the 1/4 cup and just went with the 1 stick. After I had mixed everything up, I occurred to me that the average stick of butter is 1/2 cup and not 1/4 cup. I came up with 2 possible options for the discrepancy. Either my Mom put the wrong measurement down or she buys half sticks. While the pie was already in the oven, I called my Mom to see which it was (because I could do absolutely nothing about it then anyway). Unfortunately, it was the second option. So I stared at the pie and let it bake an extra 15 minutes and it turned out great! Really though, can you go wrong with too much butter in a dessert? So here is the adapted recipe.
Mom's Pecan Pie
with an accidental adaptation by Erin
4 beaten eggs
1 cup sugar
1 cup light corn syrup
1/2 Tbsp flour
1/2 cup butter (1 stick)
2 1/2 cup pecans
pinch of salt
- Mix eggs, sugar, syrup, flour, and salt. Add melted butter. Stir in pecans and pour into an unbaked pie crust. Bake at 350 degrees for approximately 1 hour and 15 minutes (start checking on it at 1 hour).
Tuesday, November 29, 2011
Elias' Birthday Cupcakes
It's a month and a half later and I'm finally posting about Elias' birthday cupcakes. Some might say that I should just have forgotten about them but they were so good that I can't.
I'll be honest...I don't really like cake. It's usually dry and covered in overly sweet frosting. I'd much prefer something ooey and gooey. I wanted to keep with tradition for Elias' birthday though. How can you not have cake on your first birthday?!! So I went in search of something yummy to make for him. I hit a spot of inspiration when I saw apple cake. Elias loves apples!! Although the apple cake I've had before was also dry and a bit lack luster in flavor as well. I decided to combine a couple different recipes I found to see if I could solve the too dry/too mellow problem of apple cake.
Double Apple Cupcakes
3/4 cup sugar
6 Tbsp butter
3/4 tsp vanilla extract
2 eggs
1/2 cup applesauce, unsweetened (1 jar of baby food works perfect for this)
2 cups flour
1/2 tsp baking powder
1/2 tsp baking soda
1/4 tsp salt
3/4 tsp cinnamon
1/4 tsp nutmeg
1/8 tsp cloves
1/2 cup buttermilk
1 apple, finely diced
This most certainly goes best with a cinnamon buttercream frosting. Here's my own recipe for that as well.
Cinnamon Buttercream
2 sticks butter, salted, room temperature
4 cups powdered sugar
3 Tbsp heavy cream
1 tsp vanilla extract
1 tsp cinnamon
The final product: Elias certainly liked it. Granted he's one and that was his first taste of cake. I really liked it as well (as did the rest of the guests). The cake had good apple flavor (from the diced apples) and wasn't dry at all (from the applesauce). The frosting was really divine as well. The combination was all around good and is certainly something I'll pull out each fall when apples are especially delicious. It's a super simple recipe but add a drizzle of caramel sauce or a cute caramel candy and this is ready for even the swankiest party or dessert shop display case. Try it!
I'll be honest...I don't really like cake. It's usually dry and covered in overly sweet frosting. I'd much prefer something ooey and gooey. I wanted to keep with tradition for Elias' birthday though. How can you not have cake on your first birthday?!! So I went in search of something yummy to make for him. I hit a spot of inspiration when I saw apple cake. Elias loves apples!! Although the apple cake I've had before was also dry and a bit lack luster in flavor as well. I decided to combine a couple different recipes I found to see if I could solve the too dry/too mellow problem of apple cake.
Double Apple Cupcakes
3/4 cup sugar
6 Tbsp butter
3/4 tsp vanilla extract
2 eggs
1/2 cup applesauce, unsweetened (1 jar of baby food works perfect for this)
2 cups flour
1/2 tsp baking powder
1/2 tsp baking soda
1/4 tsp salt
3/4 tsp cinnamon
1/4 tsp nutmeg
1/8 tsp cloves
1/2 cup buttermilk
1 apple, finely diced
- Preheat oven to 325 degrees and prepare a muffin tin with paper liners.
- Beat the sugar and butter with an electric mixer until light and fluffy. Add vanilla and eggs and beat to combine. Add applesauce and combine well. Set aside.
- In a separate bowl add the flour, baking powder, baking soda, salt, and spices and whisk together.
- Add half of the flour mixture to the batter and then add half of the buttermilk (or soured milk: stir together 1/2 Tbsp lemon juice and 1/2 cup regular milk and let sit for 5 minutes). Combine completely and repeat.
- Add apple chunks and scoop batter into liners until they are each 2/3 full. Bake them for 22-25 minutes. Cool completely on a wire rack before frosting.
This most certainly goes best with a cinnamon buttercream frosting. Here's my own recipe for that as well.
Cinnamon Buttercream
2 sticks butter, salted, room temperature
4 cups powdered sugar
3 Tbsp heavy cream
1 tsp vanilla extract
1 tsp cinnamon
- Beat butter with mixer until fluffy
- Add powdered sugar, 1/2 cup at a time, until completely mixed.
- Add cream and mix well. (Add a splash of milk if needed to reach desired consistency).
- Mix in vanilla and cinnamon until completely combined.
Sunday, November 20, 2011
Chocolate Chip Cookie Pie
Chocolate chip cookies are classic. Everybody loves them. How can you go wrong putting all that yummy goodness in pie form? You can't, that's how.
Chocolate Chip Cookie Pie
From HowSweetEats
2 whole eggs
1/2 cup all-purpose flour
1/2 cup sugar
1/2 cup firmly packed brown sugar
1 cup butter, melted and cooled to room temperature
1 cup chocolate chips
1 whole unbaked pie shell
Pie Crust
2 cups flour
7 Tbsp shortening, cold
4 Tbsp butter, cold
1/2 tsp salt
1 tsp sugar
1/2 baking powder
1/4 cup milk
10 drops vinegar
The final product: decadent. I couldn't get this to bake up as much as the original recipe showed (even though I baked it longer than the recipe touts) but it was still SO good. The center was ooey, gooey and oh so chocolaty. This would be wonderful with a scoop of ice cream for sure.
Chocolate Chip Cookie Pie
From HowSweetEats
2 whole eggs
1/2 cup all-purpose flour
1/2 cup sugar
1/2 cup firmly packed brown sugar
1 cup butter, melted and cooled to room temperature
1 cup chocolate chips
1 whole unbaked pie shell
- Preheat oven to 325 degrees. In a large bowl, beat eggs until foamy. Beat in flour, sugar, and brown sugar until well blended. Blend in melted butter. Stir in chocolate chips. Pour into pie shell and bake for 60 minutes. Serve warm with ice cream.
Pie Crust
2 cups flour
7 Tbsp shortening, cold
4 Tbsp butter, cold
1/2 tsp salt
1 tsp sugar
1/2 baking powder
1/4 cup milk
10 drops vinegar
- Put the flour in a large bowl and cut in the COLD shortening and butter with a pastry blender. It should look like coarse crumbs (a little smaller than pea-sized) when you're down.
- Mix in the salt, sugar, and baking powder. Mix in milk and vinegar and form a ball. It should be dry and crumbly. If you absolutely can't get the ball to stay together, add a few more drops vinegar and milk, 1 tsp at a time, until you can just get it to stay together (it normally takes at least 1 or 2 tsp to get the desired consistency).
- Roll it out on a well floured surface and transfer to a pie pan. Chill for 15-20 minutes before prebaking or filling (to allow butter and shortening to cool and to help it keep it's shape).
Tuesday, November 15, 2011
Ladyfingers
Ladyfingers sound fancy to me. I had heard of them a time or two before I started making Tyler's tiramisu but had never tried one. Even after using the store bought variety for tiramisu, I still had never eaten one by itself. I thought I should change that.
Ladyfingers
from Mastering the Art of French Cooking by Julia Child
1 Tb butter, softened
1 1/2 cups powdered sugar, in a shaker or sieve
1/2 cup granulated sugar
3 egg yolks
1 tsp vanilla extract
3 egg whites
pinch of salt
1 Tb granulated sugar
1/2 cup flour (plus more for dusting)
The final product: light and airy. These look nothing like the foamy things I bought at the store. They are crispy on the outside but still tender on the inside with just a touch of sweetness. These are great dunked in coffee or tea and would be even better sandwiched together with jam or some sort of butter cream.
FYI: They are really great in tiramisu too as they hold their shape slightly better than the store bought variety. This recipe makes just about the perfect amount for one recipe of tiramisu. Break out the pastry bags and give it a try for yourself. It's worth the effort!
Ladyfingers
from Mastering the Art of French Cooking by Julia Child
1 Tb butter, softened
1 1/2 cups powdered sugar, in a shaker or sieve
1/2 cup granulated sugar
3 egg yolks
1 tsp vanilla extract
3 egg whites
pinch of salt
1 Tb granulated sugar
1/2 cup flour (plus more for dusting)
- Preheat oven to 300 degrees
- Prepare baking sheets: butter lightly, dust with flour and knock off excess flour.
- Gradually beat the sugar into the egg yolks, add the vanilla and continue beating for several minutes until the mixture is thick, pale yellow and forms ribbons when the beaters are removed.
- Beat the egg whites and salt together in a separate bowl until soft peaks are formed. Sprinkle on the sugar and beat until stiff peaks are formed.
- Scoop 1/4 of the egg whites over the top of the egg yolk mixture. Sift 1/4 of the flour and delicately fold in until partially blended. Repeat 3 more times until all is combined and partially blended. Do not attempt to blend the mixture too thoroughly or you will deflate the batter.
- Scoop batter into a pastry bag and squeeze out even lines onto the prepared baking sheets, making finger shapes 4 inches long and 1 1/2 inches wide, spaced 1 inch apart. Sprinkle with 1/16-inch layer of powdered sugar.
- Bake in preheated oven for about 20 minutes. They should be pale brown under the sugar layer and slightly crusty on the outside. They should be tender but dry on the inside. As soon as they are done, remove from baking sheets with a spatula and cool on wire racks.
FYI: They are really great in tiramisu too as they hold their shape slightly better than the store bought variety. This recipe makes just about the perfect amount for one recipe of tiramisu. Break out the pastry bags and give it a try for yourself. It's worth the effort!
Monday, November 14, 2011
Peanut Butter Pie
I love chocolate and peanut butter. I like pie. Therefore, I should like a peanut butter pie. So should you.
Vintage Peanut Butter Pie
from Tasty Kitchen
1 whole prebaked pie crust
8 oz cream cheese, softened
3/4 cups granulated sugar
1 cup creamy peanut butter
2 tsp vanilla extract
1 cup whipping cream
8 oz semi-sweet chocolate
4 Tbsp hot brewed coffee
2 Tbsp heavy cream
The peanut butter layer in the pie crust. I used a regular pie crust so that I could practice making pie crust. This would be just as good with a chocolate graham cracker or Oreo crust.
The chocolate layer. It's so pretty and smells delicious!
The final product: decadent and wonderful. As you can see from the picture, it doesn't cut into nice, pretty slices, but it tastes so good that it doesn't matter. I say that even after going to all the effort of making the pie crust too. This pie is really, really good. The peanut butter layer is smooth and delicious (although with peanut butter and cream cheese, how could it not be?) and the top layer adds just enough chocolate to finish it off.
Vintage Peanut Butter Pie
from Tasty Kitchen
1 whole prebaked pie crust
8 oz cream cheese, softened
3/4 cups granulated sugar
1 cup creamy peanut butter
2 tsp vanilla extract
1 cup whipping cream
8 oz semi-sweet chocolate
4 Tbsp hot brewed coffee
2 Tbsp heavy cream
- Prepare the prebaked pie crust.
- Combine the cream cheese, sugar, peanut butter, and vanilla. Beat until smooth and fully incorporated. Whip the whipping cream and fold it into the peanut butter mixture. By adding 1/4 of the whipping cream to begin with, the ingredients will be easier to combine Take care not to deflate the whipping cream. Pour the filling into the cooled pie crust, smooth the top and chill in the fridge for about an hour.
- Break up the semi-sweet chocolate and pour in the hot coffee. Let the coffee melt the chocolate before adding the heavy cream. Stir until smooth and pour evenly over the entire pie. Chill the pie for an additional 3 hours. Serve cold.
Saturday, October 22, 2011
Apple Pie
Apple pie. It's an American classic. There are a million different recipes so how does one know where to begin? Look at the recipe with the word "Best" in the title. (That actually rarely works but I tried this time anyway.)
Best Apple Pie
from Tasty Kitchen
3/4 cups all-purpose flour
1 cup white sugar
1 cup brown sugar
2 tsp cinnamon
6 cups Granny Smith apples, peeled and chopped
2 Tbsp butter
2 pie crusts
1 tsp cinnamon sugar
milk for brushing
With this much cinnamon-sugar and butter, the filling has to be good, right?
This was my very first double crust pie. I used Sylvia's Perfect Pie Crust. It actually went fairly well. I forgot to cut the vent holes until after putting the crust on the pie, but it didn't seem too difficult to do that afterward. I had one rouge apple puncture my crust but that also didn't seem that bad.
The finished product: pretty and delicious. The filling is what sets this pie apart. It's soooo good. It might actually be the best (it's definitely the best I've ever had). Try it.
Best Apple Pie
from Tasty Kitchen
3/4 cups all-purpose flour
1 cup white sugar
1 cup brown sugar
2 tsp cinnamon
6 cups Granny Smith apples, peeled and chopped
2 Tbsp butter
2 pie crusts
1 tsp cinnamon sugar
milk for brushing
- Mix flour, sugars, and cinnamon in a large bowl. Add apples and mix well.
- Line you pie pan with one crust. Add all of the covered apples to the pie pan. Pour the remaining dry mix over the apples.
- Cut up butter and place around the top of the apples.
- Cut vent holes in the remaining pie crust. Place crust over pie and seal the edges. Brush entire crust with milk and sprinkle with cinnamon sugar.
- Bake at 375 degrees for 45-55 minutes until apples are soft.
Friday, October 7, 2011
Lime!!
I love lime. A lot. Especially since I was pregnant with Elias...I craved lime like crazy and it still makes me pretty happy. Enter Key lime pie.
Key Lime Pie
from Better Homes and Gardens
1 baked pie crust
3 eggs
1 14-oz can sweetened condensed milk
1/2 cup lime juice or bottled Key lime juice
3 Tbsp water
few drops green food coloring (optional)
1 recipe whipped cream
The finished product: tangy and satisfying. I'm not a huge fan of meringue so I skipped that, but the result was still super delicious. Try it when you're looking for something tropical.
Key Lime Pie
from Better Homes and Gardens
1 baked pie crust
3 eggs
1 14-oz can sweetened condensed milk
1/2 cup lime juice or bottled Key lime juice
3 Tbsp water
few drops green food coloring (optional)
1 recipe whipped cream
- Separate egg yolks from whites; set whites aside for meringue or another use.
- For filling, in a medium bowl beat egg yolks with wire whisk or fork. Gradually whisk or stir in sweetened condensed milk; add lime juice, water and food coloring (if desired). Mix well (mixture will thicken).
- Spoon thickened filling into pie shell. Bake in a 350 degree oven for 25 minutes. Cool on a wire rack for 1 hour. Cover and chill pie for 3 to 4 hours. Meanwhile prepare whipped cream. Spread over chilled pie and serve.
Thursday, October 6, 2011
Strawberry Pie
Strawberry pie. It's so good and another one of Tyler's favorites. I've tried to make it at least a couple of times before. It didn't go well. Alright, it went horribly. I remember an undercooked crust filled with (and somewhat floating in) a runny mess of sweet, red goo. Bleck! This time I tried a Cooks Illustrated recipe and it went much better. I love their recipes because they make it almost fool proof. There might be a few extra steps along the way but those steps always avert a culinary catastrophe. I also tried a different pie crust recipe this time around. So let's get going!!
Pie Crust
from Tasty Kitchen
1/4 cup water
1/2 cup shortening (or butter)
1 cup all-purpose flour
1 pinch salt
I tried another pie crust recipe. I just wanted to check out my options. I also wanted to explore the world of butter pie crusts so I used the butter option instead of shortening. Since this is a prebaked crust, I tried a bunch of tricks to keep it from bubbling and generally turning into mess. All my tricks were found in the same edition of Cooks Illustrated as my filling. I put the shaped pie crust in the refrigerator for about 20 minutes to cool the butter and then stuck it in the freezer for about 10 minutes to set the pie crust's shape. I also tried the pie weights method (actually I used beans because I have a lot of dried beans). It involves lining your pie crust with some greased layers of foil, filling it with 2 cups of pie weights, and baking until 15 minutes before the end of your cook time. At that point you carefully remove you foil and weights and stick it back in to brown up to that pretty golden brown.
On the whole, the pie crust went well. I don't know if all the hoops I jumped through really helped but it made me feel better that I was trying. It also tasted really good. Butter in a crust is just awesome. I noticed that butter tastes better in a crust but shortening gives you that awesome flaky texture.
You might notice the strawberries included in the picture. They are strategically placed to cover up some minor holes. I remembered my last attempt to make strawberry pie where the filling escaped through some holes and partially filled the bottom of the pie pan. Sticky and gross! The strawberries actually did a good job filling the holes and preventing that issue. Yay!
Icebox Strawberry Pie
from Cook's Illustrated
Filling
2 lb frozen strawberries
2 Tbsp lemon juice
2 Tbsp water
1 Tbsp unflavored gelatin
1 cup sugar
pinch salt
1 lb fresh strawberries, hulled and sliced thin
1 pie shell, baked and cooled
Topping
4 oz cream cheese, softened
3 Tbsp sugar
1/2 tsp vanilla extract
1 cup heavy cream
Notes about the process: cooking the strawberries is messy. I had splatters of strawberry goo all over my kitchen. I'm not sure what to do to prevent this next time around aside from very diligent stirring but even then I'm not sure it's avoidable. Be prepared for some post pie cleanup.
The fresh strawberries being mixed with the cooked berries. So yummy smelling. I'm certain I could have been happy eating this straight.
The finished product: so good!! The filling set up really well but wasn't too hard either. It was sweet and smooth and delicious. What really made the whole thing was the topping that went with it. The cream cheese whipped cream was incredible! Yay for conquering the beast!
Pie Crust
from Tasty Kitchen
1/4 cup water
1/2 cup shortening (or butter)
1 cup all-purpose flour
1 pinch salt
- Add water and shortening to a small saucepan and heat just until shortening is melted. Set aside.
- Put flour and salt into a 9-inch pie pan. With a fork, stir in the water/shortening mixture just until all the flour is moistened.
- With your hands, form the dough into a fall and then pat into the bottom and up the sides of the pie plate. Finish the top edge and bake as desired.
On the whole, the pie crust went well. I don't know if all the hoops I jumped through really helped but it made me feel better that I was trying. It also tasted really good. Butter in a crust is just awesome. I noticed that butter tastes better in a crust but shortening gives you that awesome flaky texture.
You might notice the strawberries included in the picture. They are strategically placed to cover up some minor holes. I remembered my last attempt to make strawberry pie where the filling escaped through some holes and partially filled the bottom of the pie pan. Sticky and gross! The strawberries actually did a good job filling the holes and preventing that issue. Yay!
Icebox Strawberry Pie
from Cook's Illustrated
Filling
2 lb frozen strawberries
2 Tbsp lemon juice
2 Tbsp water
1 Tbsp unflavored gelatin
1 cup sugar
pinch salt
1 lb fresh strawberries, hulled and sliced thin
1 pie shell, baked and cooled
Topping
4 oz cream cheese, softened
3 Tbsp sugar
1/2 tsp vanilla extract
1 cup heavy cream
- Cook frozen berries in large saucepan over medium-low heat until berries begin to release juice, about 3 minutes. Increase heat to medium high heat and cook, stirring frequently, until thick and jamlike, about 25 minutes (mixture should measure 2 cups).
- Combine lemon juice, water and gelatin in small bowl. Let stand until gelatin is softened and mixture has thickened, about 5 minutes. Stir gelatin mixture, sugar and salt into cooked berry mixture and return to simmer, about 2 minutes. Transfer to bowl and cool to room temperature, about 30 minutes.
- Fold fresh berries into filling. Spread evenly in pie shell and refrigerate until set, about 4 hours.
- With hand mixer on medium speed, beat cream cheese, sugar and vanilla until smooth, about 30 seconds. With mixer running, add cream and whip until stiff peaks form, about 2 minutes. Serve pie with whipped cream topping.
Wednesday, September 28, 2011
Summer of the Pies
This summer I decided it was time to conquer my fear of pie crust. It has been my nemesis for quite some time. I'm not sure why but every time I've tried to make pie crust, it's resulted in either tears or expletives (or some combination of equally frustration-reliving actions). There have been multiple pie crusts that have just ended up in a ball in the trash.
We were giving Addilyn a lecture about the importance of practicing new skills (riding a bike) to learn how to do something better and it clicked. The only way I was ever going to conquer the pie was to practice...a lot. Since then, I have made 10 pies (counting the one I made today). Here is the first in my series.
The first pie crust recipe I tried was Sylvia's Perfect Pie Crust. It's got perfect in the name so that's got to be good, right?
Sylvia's Perfect Pie Crust
tastykitchen.com
1 1/2 cup Crisco
3 cups all purpose flour
1 whole egg
5 Tbsp cold water
1 Tbsp white vinegar
1 tsp salt
The filling I chose for the first pie was inspired from a pie Tyler adored when we lived in Manhattan. He's been asking me to make it since we left but I could never find a recipe. This isn't exactly it but it works just as well.
Easy Peach Cream Pie
tastykitchen.com
1 1/2 lb fresh peaches, peeled and sliced (about 4 peaches)
1 unbaked pie shell
2 eggs
1 cup sugar
1/4 cup all purpose flour
dash salt
1 cup heavy cream
1 tsp vanilla
As you can tell, my first attempt wasn't gorgeous. I didn't have the cute fluted-edge I would have liked but there wasn't any holes and that was the important part. It baked up really flaky which was nice. It's a really good texture and the extra frozen pie crusts are really nice to have around. As for the filling, it was really, really good. This filling was actually used for pie #1 and #4. It cuts nicer when it's cold but it tastes heavenly when warm. So good.
Two down, eight to go.
We were giving Addilyn a lecture about the importance of practicing new skills (riding a bike) to learn how to do something better and it clicked. The only way I was ever going to conquer the pie was to practice...a lot. Since then, I have made 10 pies (counting the one I made today). Here is the first in my series.
The first pie crust recipe I tried was Sylvia's Perfect Pie Crust. It's got perfect in the name so that's got to be good, right?
Sylvia's Perfect Pie Crust
tastykitchen.com
1 1/2 cup Crisco
3 cups all purpose flour
1 whole egg
5 Tbsp cold water
1 Tbsp white vinegar
1 tsp salt
- In a large bowl, with a pastry cutter, gradually work the Crisco into the flour for about 3 to 4 minutes until it resembles a coarse meal. In a small bowl, beat an egg with a fork and then pour it into the flour/shortening mixture. Add 5 Tbsp of cold water, 1 Tbsp of white vinegar, and 1 tsp of salt. Stir together gently until all of the ingredients are incorporated.
- Separate the dough into thirds. Form 3 even sized balls of dough and place each dough into a large freezer bag. Using a rolling pin, slightly flatten each ball of dough (about 1/2 inch thick) to make rolling easier later. Seal the bags and place them in the freezer until you need them. (If you are using them immediately, freeze for 15 to 20 minutes to chill.)
- When you are ready to use the dough to make a crust, remove from the freezer and allow to thaw for 15 minutes. On a floured surface roll the dough, starting at the center and working you way out. If the dough is sticking to the countertop use a metal spatula and carefully scrape it up and flip it over and continue rolling until it's about 1/2 inch larger in diameter than your pie pan.
- With a spatula, lift the dough carefully form the surface of the counter into the pie pan. Gently press the dough against the corner of the pan. Go around the pie pan pinching and tucking the dough to make a clean edge.
The filling I chose for the first pie was inspired from a pie Tyler adored when we lived in Manhattan. He's been asking me to make it since we left but I could never find a recipe. This isn't exactly it but it works just as well.
Easy Peach Cream Pie
tastykitchen.com
1 1/2 lb fresh peaches, peeled and sliced (about 4 peaches)
1 unbaked pie shell
2 eggs
1 cup sugar
1/4 cup all purpose flour
dash salt
1 cup heavy cream
1 tsp vanilla
- Place peaches in pie shell
- Beat eggs slightly in a bowl; blend in sugar, flour and salt.
- Stir in cream and vanilla; blend well. Pour over peaches.
- Bake at 375 degrees for 40-50 minutes or until center shakes slightly when moved. Serve warm or for a firmer pie, chill before serving. Refrigerate any leftovers. (It also freezes well.)
Two down, eight to go.
Friday, September 16, 2011
Chocolate Mousse
This is my first recipe from the Julia Child's cookbook that Tyler got me for my birthday. Yay!
Chocolate Mousse
adapted from Mastering the Art of French Cooking
4 egg yolks
3/4 cup sugar (extra fine if available)
1 tsp vanilla
6 oz semisweet baking chocolate
4 Tb strong coffee
1 1/2 sticks unsalted butter
4 egg whites
pinch of salt
1 Tb granulated sugar
The final product: chocolaty and delicious. This so good. It's creamy with just a hint of graininess (which if you don't like, could be fixed by using the extra fine or instant sugar); Tyler and I both love our chocolate dark and grainy so this is perfect. The chocolate is rich and intense. If you are susceptible to caffeine though, use decaf coffee or espresso. And definitely serve this with a healthy scoop of whipped cream. So good!!
Chocolate Mousse
adapted from Mastering the Art of French Cooking
4 egg yolks
3/4 cup sugar (extra fine if available)
1 tsp vanilla
6 oz semisweet baking chocolate
4 Tb strong coffee
1 1/2 sticks unsalted butter
4 egg whites
pinch of salt
1 Tb granulated sugar
- Beat egg yolks and sugar together until mixture is thick, pale yellow, and falls back upon itself forming a slowly dissolving ribbon. Beat in vanilla. Place the mixing bowl over a pan of not-quite-simmer water and continue beating for 3 to 4 minutes until mixture is foamy and too hot for your finger. Then beat over cold water for 3 to 4 minutes until the mixture is cool.
- Melt chocolate with coffee over hot water. Remove from heat and beat in butter a bit at a time, to make a smooth cream. Beat the chocolate into the egg yolks and sugar.
- Beat egg whites and salt until soft peak s are formed; sprinkle on the sugar and beat until stiff peaks are formed. Stir one fourth of the egg whites into the chocolate mixture. Fold in the rest.
- Pour into serving dish or individual dessert cups. Refrigerate for at least 2 hours or overnight.
Thursday, March 17, 2011
Birthday Cake
A couple of weeks ago was my birthday. I made my own cake...because I wanted to. I chose chocolate and peanut butter as my inspiration and a giant cupcake pan as my mold. Woohoo!!
Chocolate Cake
From Hershey's
2 cups sugar
1 3/4 cups all-purpose flour
3/4 cup cocoa
1 1/2 tsp baking powder
1 1/2 tsp baking soda
1 tsp salt
2 egg
1 cup milk
1/2 cup oil
2 tsp vanilla extract
1 cup boiling water
Cake ingredients ready to be mixed. I chose to use the Hershey's Special Dark Cocoa because I thought a dark chocolate cake would be dreamy (it was a good choice; you should try it).
That's one runny cake batter! It should be moist though, right?
Here is my cake pan. I lost the little sheet that came with it which tells you how to adjust cake recipes to fit this pan (how much to make). I tried to go online to see if I could find such information and ended up just guessing.
Peanut butter and sugar...this is looking good.
Creamy and dreamy frosting. This is super light and smooth. I could eat it with a spoon.
The two sides of the cupcake all set up.
I got to play with my cake decorating supplies. I haven't really broken them out before so I got ot experiment which was super fun.
The finished product: this was really good. The cake was extremely moist. The flavor of the cake was good but was really a background player to the frosting. This frosting was phenomenal. I'm not really a big frosting eater. It's normally too sweet and dry; a lot of times I will actually eat the cake and skip the frosting. This frosting had awesome texture (light and creamy) and incredible flavor (peanut buttery but not overpowering). It was rich but not so rich that it seemed too much. Seriously, this was the best frosting I've ever tasted in every way.
Chocolate Cake
From Hershey's
2 cups sugar
1 3/4 cups all-purpose flour
3/4 cup cocoa
1 1/2 tsp baking powder
1 1/2 tsp baking soda
1 tsp salt
2 egg
1 cup milk
1/2 cup oil
2 tsp vanilla extract
1 cup boiling water
- Heat oven to 350 degrees. Grease and flour baking pan(s).
- Stir together sugar, flour, cocoa, baking powder, baking soda, and salt in large bowl. Add eggs, milk, oil and vanilla; beat on medium speed of mixer 2 minutes. Stir in water. (Batter will be thin.) Pour batter evenly into prepared pans.
- Bake 30 to 35 minutes or wooden pick inserted in center comes out clean. Cool 10 minutes; remove from pans to wire racks. Cool completely.
From here
1 cup powdered sugar
1 cup creamy peanut butter
5 Tbsp unsalted butter, at room temperature
3/4 tsp vanilla extract
1/4 tsp Kosher salt
1/3 cup heavy cream
- Combine all ingredients except for cream. Beat with an electric mixer on medium low speed until creamy. Add cream and beat on high speed until smooth.
Friday, February 25, 2011
Pumpkin Bars
Pumpkin is good. It's creamy and not-too-sweet. It makes you feel all warm inside. That's why it's so exciting when you see it start filling the shelves in the fall. And that's why I then fill my shelves with it at home. If you're like me, you have a few extra cans of pumpkin laying around (or put away properly if you're not like me). Here's a delicious way to use them up.
Pumpkin Bars
from Better Homes and Gardens
2 cups flour
1 1/2 cups sugar
2 tsp baking powder
2 tsp ground cinnamon
1 tsp baking soda
1/4 tsp salt
1/4 tsp ground cloves
4 eggs, beaten
1 (15-oz) can pumpkin
1 cup cooking oil
cream cheese frosting
1/4 cup butter, softened
1 tsp vanilla
2 1/2 to 3 cups powdered sugar
I looked back now and saw that the recipe didn't call for me dirtying another bowl to mix together the wet ingredients separately. I'm just going to chalk it up to my newly found baker's instincts. I do such things out of habit now.
The prepared batter. I love the orangeness pumpkin brings to anything it's in. It's pretty and reminds us that life won't always be so white, dull and lifeless (can you tell I'm ready for winter to be over?).
The pumpkin cake cooling.
Frosting before the powder sugar was added. Mmm...it smells nice.
Finished product: classically good. This isn't an astounding new recipe. It's more of an old favorite. It's a classic but a classic is a classic for a reason...mainly because it's good. Each bar is moist and yet still light. The frosting adds just enough decadence without making it heavy or too rich. Enjoy!
Pumpkin Bars
from Better Homes and Gardens
2 cups flour
1 1/2 cups sugar
2 tsp baking powder
2 tsp ground cinnamon
1 tsp baking soda
1/4 tsp salt
1/4 tsp ground cloves
4 eggs, beaten
1 (15-oz) can pumpkin
1 cup cooking oil
cream cheese frosting
- Preheat oven to 350 degrees. In a large bowl stir together the flour, sugar, baking powder, cinnamon, soda, salt, and cloves. Stir in eggs, pumpkin, and oil until combined. Spread batter in an ungreased 15x10x1-inch baking pan.
- Bake for 25 to 30 minutes or until a wooden toothpick inserted in the center comes out clean. Let stand in pan on a wire rack for 2 hours. Spread with Cream Cheese Frosting. Cut into bars.
Makes 48 bars.
Cream Cheese Frosting
4 oz cream cheese1/4 cup butter, softened
1 tsp vanilla
2 1/2 to 3 cups powdered sugar
- In a medium bowl beat cream cheese, butter, and vanilla with an electric mixer on medium speed until light and fluffy. Gradually add powdered sugar to a frosting of spreading consistency.
Friday, October 15, 2010
French Silk Pie
Pie has always been a scary thing for me. Actually it wasn't the pie that was so scary, it was the pie crust that really intimidated me. I've tried a few times to make pie crust and had things go horribly awry. In an effort to address my fears and in hopes of powering through, I decided to make a couple of pies. This is the first of my most recent attempts.
All-Butter Pie Crust
from Tasty Kitchen
2 cups flour
11 Tbsp butter
1/4 tsp salt
1/4 cups ice water
Ingredients:
Butter ready to be cut into the flour.
The dough after the addition of the 1/4 of water. It was still really crumbly at this point and I added the entire 1/4 cup (which the recipe writer said that I probably wouldn't need all of).
In light of my previous pie crust failures, I decided to go against my instincts and trust the recipe. I got the dough to sort-of stick together long enough to get it wrapped in plastic and stuck in the fridge, hoping that it would become more of a dough consistency overnight.
My wishful thinking proved foolish. In the morning, I unwrapped the dough ball and it immediately crumbled. In my frustration, I added more water...which resulted in being too much water. Then I added some more flour. This is my final product of dough, all rolled out. It ended up being really thick but I had trouble getting it to roll out any more than this.
Aside from being pretty thick, the transfer to the pie pan went well and the dough looked good.
The final pie crust baked and ready to be filled. I'm going to go ahead and review the crust now. This wasn't great. It was super-hard, like difficult to even cut. The flavor was good though. It was so hard though, that it really detracted from the overall pie. That's sad because the filling is awesome.
Filling ingredients:
Melted chocolate. So shiny.
Beating the eggs in the poor-man's double boiler.
The bowl I used was almost too small for this. The egg mixture grew quite a bit and I was pretty worried at one point that it would outgrow this bowl. It hadn't by the time I stopped. I was never quite able to get it up to the 160F point and I mixed for quite a bit longer than the 7-10 minutes touted in the recipe.
After standing there with the electric mixer at the stove for at least 15 minutes, I decided to switch to the standing mixer. It was a much needed break for my arm.
The filling after adding the chocolate, vanilla, butter and whipped cream. It's super creamy.
The final product: the filling is rich and creamy and very chocolatey. It really is quite good. It's much better than any other French Silk I've tried and that's mostly due to its intense chocolate taste and incredibly creamy texture. I don't know if it's the butter or the whipped cream (or the combination of the two) that makes this so creamy and dreamy, but whatever it is works wonderfully. I would recommend cutting this in at least 10 pieces (as opposed to 6-8) as it is fairly rich. Even though it's a bit more complex than others, I think this will be my go-to chocolate pie recipe (my husband really likes chocolate pies). I plan to use it often in the future...if I can make a decent pie crust, that is.
All-Butter Pie Crust
from Tasty Kitchen
2 cups flour
11 Tbsp butter
1/4 tsp salt
1/4 cups ice water
- Measure flour and salt into a bowl. Cut the cold butter into small chunks and throw on top of the flour. Cut the butter into the flour until butter is in small crumbly pieces. Add ice water a tablespoon at a time while stirring the dough mixture with a fork until it comes together easily but isn't sticky. Bring it all together and pat into a ball. Wrap in plastic and put in the fridge.
- When you are ready to roll out your pie crust, lightly flour your work surface. Handle the dough as little as possible; the less you touch it, the more tender and flaky it will be. Starting in the center, roll the dough out into a circle, about 1/8" thick. When you've reached your desired thickness, place the rolling pin in the middle and gently fold the crust over the rolling pin. Lift the dough onto your pie plate and unfold it.
- If you need to pre-bake the crust, prick the bottom of the crust with a fork and bake at 450F for 10-12 minutes or until golden brown.
French Silk Chocolate Pie
by Cook's Country
1 cup heavy whipping cream, chilled
3 large eggs
3/4 cup sugar
2 Tbsp water
8 oz bittersweet chocolate, melted and cooled
1 Tbsp vanilla
8 Tbsp unsalted butter, cut into 1/2-inch pieces and softened
- With electric mixer on medium-high speed, whip cream to stiff peaks, 2-3 minutes. Transfer to small bowl and refrigerate.
- Combine eggs, sugar and water in a large heatproof bowl set over a medium saucepan filled with 1/2 inch barely simmering water. With electric mixer on medium speed, beat until egg mixture is thickened and registers 160F, 7-10 minutes. Remove bowl from heat and continue to beat egg mixture until fluffy and cooled to room temperature, about 8 minutes.
- Add chocolate and vanilla to cool egg mixture and beat until incorporated. Beat in butter, a few pieces at a time, until well combined. Using spatula, fold in whipped cream until no streaks of white remain. Scrape filling into pie shell and refrigerate until set, at least 3 hours and up to 24 hours.
Subscribe to:
Posts (Atom)